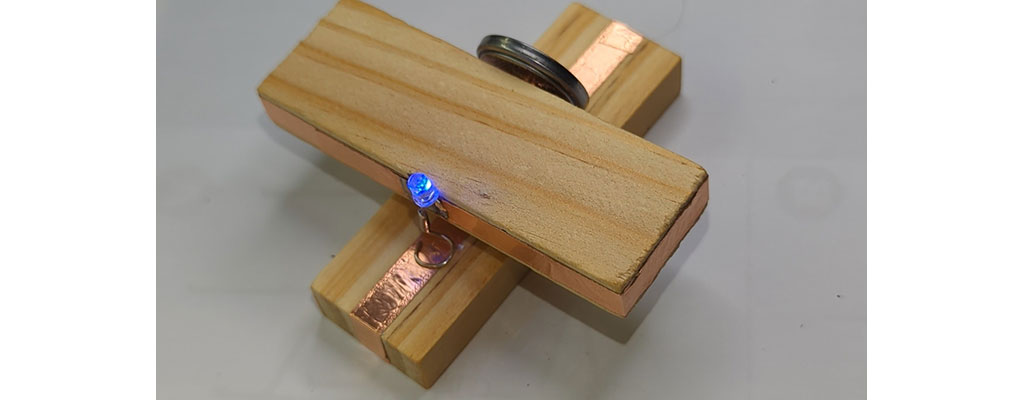
Another simple and somewhat useless ‘object’. Just for fun. A neodymium magnet, wooden blocks and a LED. One joint to solder. Try to experiment with the (battery) wheel…
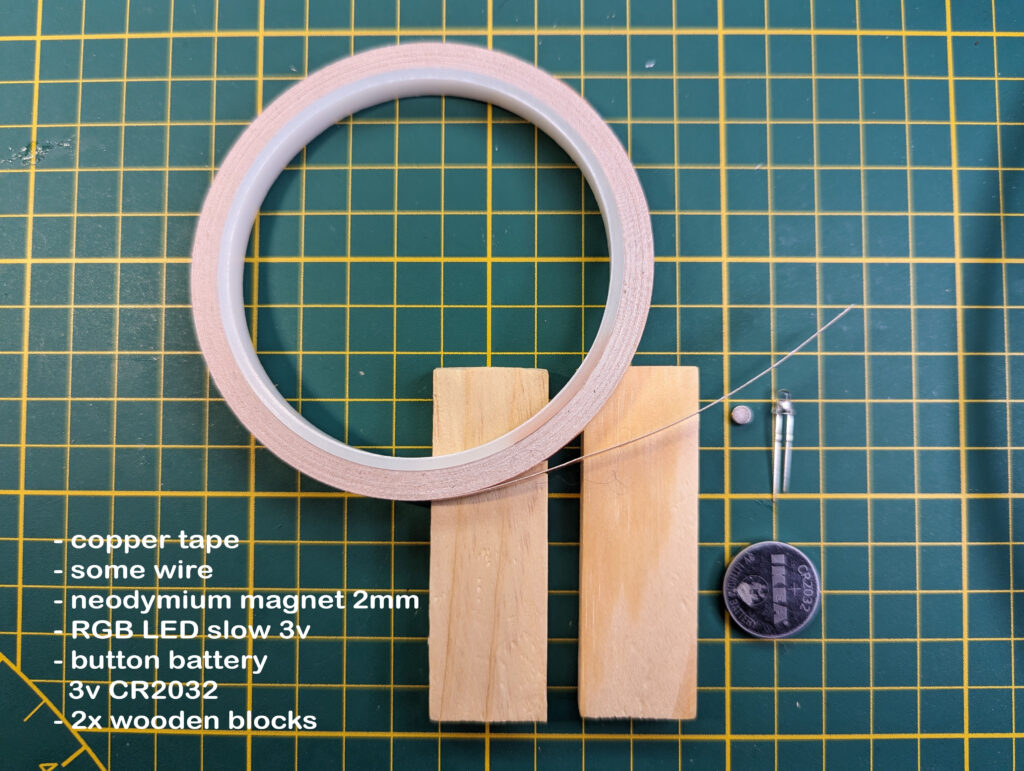
Used materials:
- copper tape 5mm
- some wire
- neodymium magnet 3x2mm
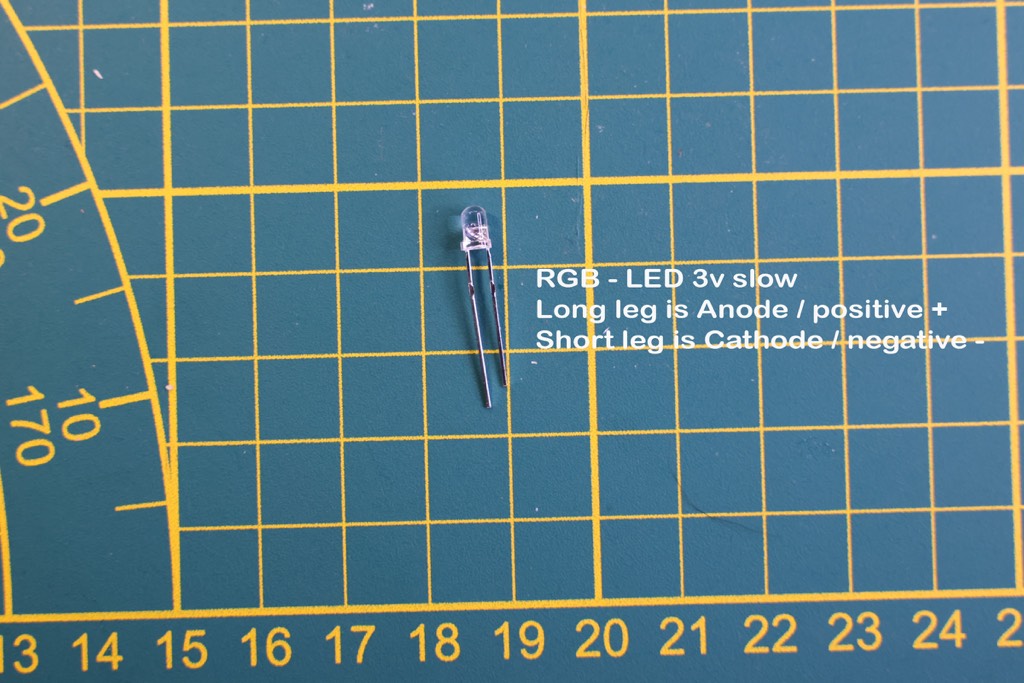
- 3mm rgb slow flash LED, 3v
- cr2032 3v button battery
- 2x wooden blocks
- and of course a soldering iron with some solder, and other tools….
Circuit
The copper tape conducts electricity from the battery to the LED. The battery has a positive and a negative side. Often the positive side is marked with a ‘+’ sign. The LED also has a positive leg (long) and negative leg (short).
Step by step instructions
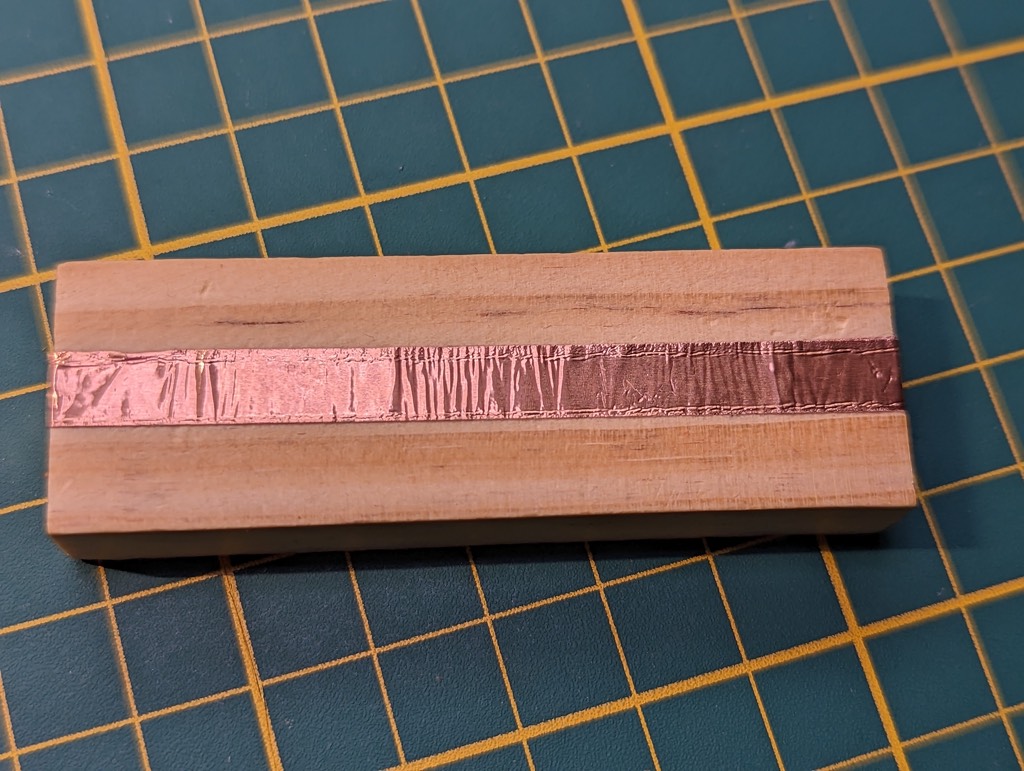
Wrap copper tape around the first block in the middle
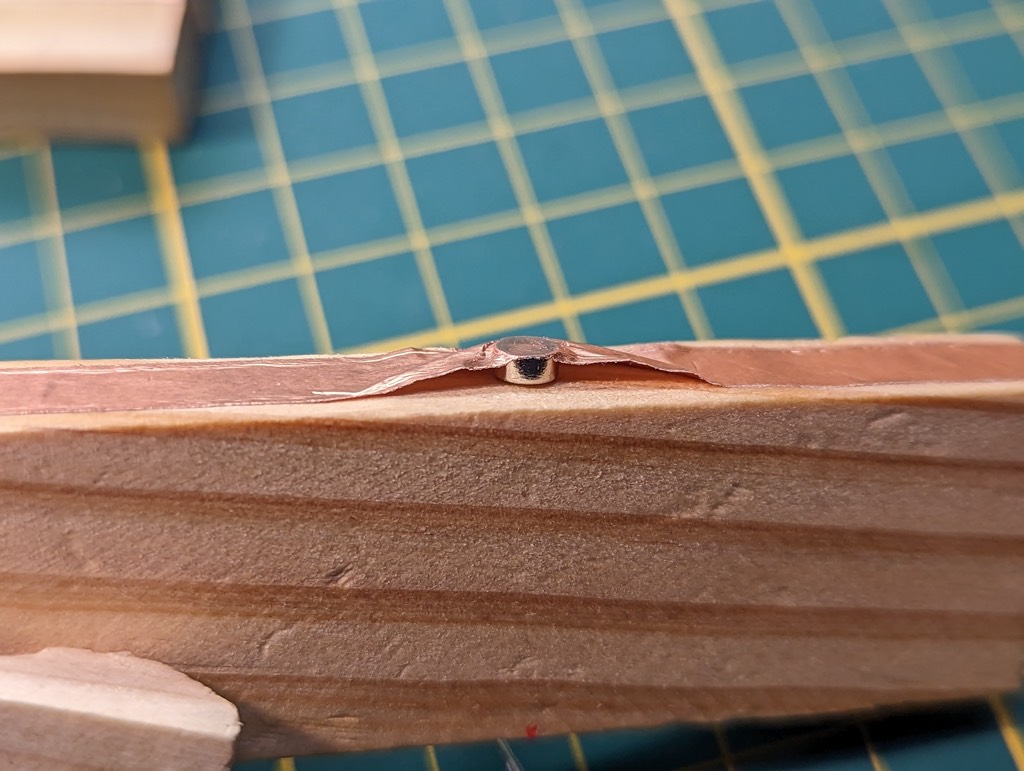
Wrap copper tape around the second block, hide the magnet under the tape, exactly in the middle of the block
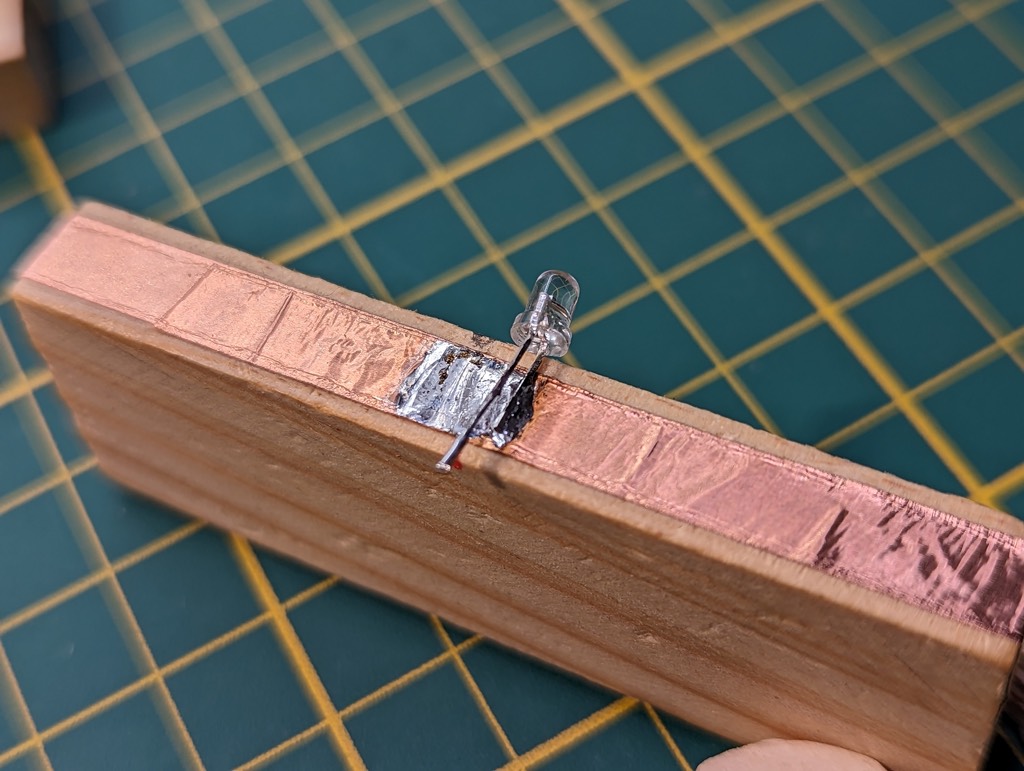
(On the opposite side of the magnet in the middle of the block) Cut & solder the short leg (cathode) of the LED
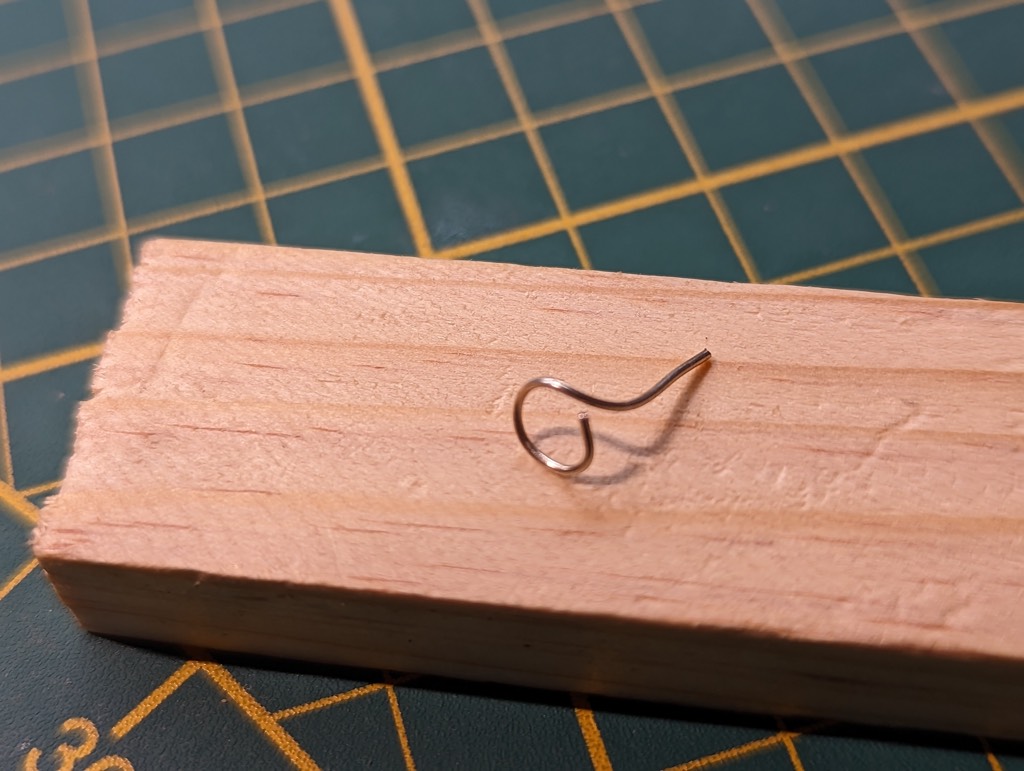
Make a new leg from some wire
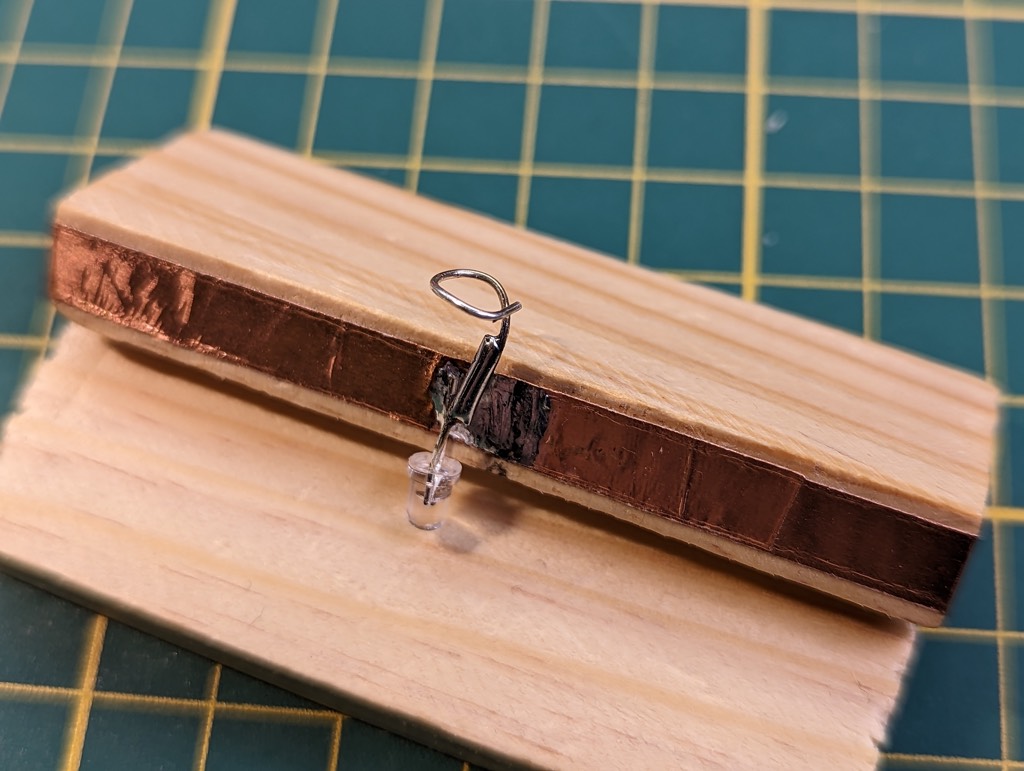
Solder the new leg to the long leg (anode) of the LED

Attach the negative side of the battery to the magnet, and position the top block on the first block. The battery looks like a wheel, wiggle it to get the top block to balance.
When finished you can combine this object with this wooden structure. Or check my youtube channel.